Organizing Digital Photos
We take thousands of digital photos a year. It’s easy, it’s convenient, it’s cheap. I have well over 80,000 digital photos from the past 12 years plus another 5000 or so in print form dating to … well way back. Bet you do too!
Over the years you will move from computer to computer, camera to camera, phone to phone, and store photos in myriad places. It’s not easy to keep up with digital photos.
Where are your photos now?
- Stored in plastic shoe boxes
- Stored in cardboard boxes
- Stuck in boxes, drawers, and envelopes
- Still in the developing envelopes (along with triplicate copies)
- Organized in non-acid free photo albums … please not the magnetic ones
- Stored on your current phone
- Stored on an old phone
- Spread across multiple computers, laptops, and tablets
- Lost on an external hard drive
- Scattered on flash drives, CDs, and floppies

Let’s start with digital photos!
Gather all digital photos on to one computer
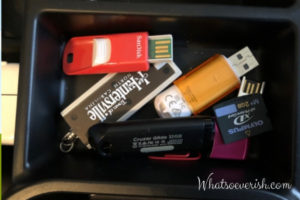
Look on your devices and gather photos into one place. I know many of the digital photos I’ve taken have disappeared on lost flash drives and CDs. Copy them onto one easy to work with location like your laptop. Look on your significant other’s devices, look on Facebook, on Instagram. Look through drawers for old flash drives. Pull them all into one place. Don’t delete them until you have backed up your work.
Delete and clean up as you go
If you have multiple photos of basically the same thing choose your favorites and delete the others. You don’t need to save blurry or dark photos. Delete photos with cut off heads, closed eyes, landscapes with no people, etc. Pick the best and delete the rest. When I make photo albums I often use a landscape as the background and layer photos of people on top.

Not sure when a photo was taken?
Digital photos have information saved into them. The date is often part of the filename by your phone or camera.

Pull up a photo and right click, choose properties and find the date there.

Organize into folders by date
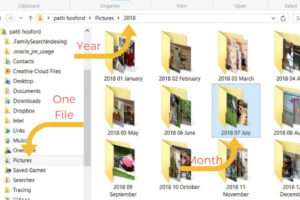
Put all your pictures in a folder labeled “Pictures.” Using one folder means that photos will be easy to back up and move to a new PC for years to come. I keep the last year or two photos of my laptop. The others are backed up on an external hard-drive but are still easily accessible.
Create a file for the year, then within that file create folders for each month. I name mine “2018 11 November” “2018 01 January” because I like for them to stay in order (I don’t want to start with 2018 April and end with 2018 November) If we have a major event or vacation within a month I’ll add a folder and name it appropriately (beach vacation).
This method is simple and fast. You’ll be able to find anything you’re looking for because you’ll have a general idea when most photos were taken.
Backup Your Photos
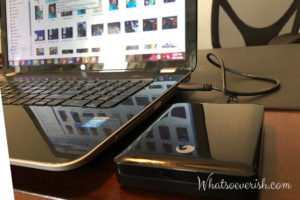
Make sure your photos are stored in at least two locations, such as on your PC and an external drive. External drives are relatively inexpensive now. For added safety in case of fire or theft, also store photos at a reputable online photo site, such as Flickr (1TB of free photo storage), Shutterfly, DropBox, etc. Adding photos to Facebook is a great way to store photos, too. I really like ThePhotoStick 128 — Easy, One Click Photo and Video Backup. It searches for photos on your device then backs them up. Buy it here!
Print an Annual Photo Album
Our family is not going to sit around a computer looking at photos and we found we were not very good at updating a digital photo frame. But, since we love to look through old scrapbooks and photo albums, creating and printing a yearly digital album is perfect for us! In January of each year, I prepare a digital scrapbook/photo album using Shutterfly. Our books have anywhere from 70 to 120 pages. My friend Donna always uses Costco.
Choose a service such as Shutterfly, Costco or Snapfish to print an annual photo book. These companies also save photos for future purchases and if a book is lost or destroyed it can be reprinted. The printed photo book will always be viewable by anyone, anytime.

A few tips
- Make sure your digital camera and other devices are set to the correct date. While sorting photos you can easily go to properties to check the date. This simple step will permanently tag every photo with the correct date. If you import other people’s hopefully their cameras are set correctly too!
- Delete as you go. If you take a lot of photos of an event take time to go through them to delete the ones you’ll never use. Doing this will save time later allowing you to see the best photos without going through every photo.
- Make organizing photos a priority. Maybe the first day of every quarter make time to delete unwanted photos and transfer them to your laptop or PC. Include photos from your spouse, children, and friends.
- Collect photos from family members especially from close family members. Add their photos to your dated collection so they are backed up. Add their great photos to your annual photo book.
- Share photos with family immediately after an event. If you wait you may never receive the photos.
Next up: scanning and organizing prints


